Monday, 12 September 2011


picture of external gas push fit connector we use this for a barby and also a gas tilley type lamp for outdoor lighting when were of grid

Sunday, 5 June 2011


in presponse to a question on the sbmcc forum ive included some pics of my crockery control system also know as how to use up lots of ofcuts system after looking at the pics ive taken im a bit miffed it looks a bit rough but as its above eye level and usually full of plates im not going to worry about it it was one of those jobs i thought was going to be difficult but turned out to be fairly simple just a case of hold bits of crockery where i wanted it to go and fitting some timbers to hold it there
the rounded ends make it easier to slide the larger plates out

Saturday, 26 March 2011

more or less finished


after a winter with nothing happening weve now finished most of the out standing tasks,
swivel seat from a vw people carrier have been fitted on the original seat box for drivers side and an additional drivers seat box for the passenger side luckily they are interchangeable
the seat were an impulse ebay buy last year and have sat under dust sheets in our bedroom for six months un known to us one of the cats had got underneath and clawed one weve picked of most of the loops and were going to live with it
these were probably one of the most challenging bits of the van .Originally they swiveled in the wrong direction b ut we found we could swap the two halves of the swivel bit left to right to correct this .however this put the seat belt mounting on the wrong side so that had to be cut of and welded on the other side
the width of the fixing meant i had to get plates welded on the spread the holes wider i could have used the vw seat belt reciever as they did fit the fiat belts but this would have meant we had no pre tensioners and would have also meant the fitting of resistors to fool the airbag system to think all was well so weve fitted the fiat items and cable tied the spare under the passengers seat
ply and covering of carpet has made a reasonable job of tidying the boxes and the step from front to back
As i didnt lay flooring before fitting the van out it meant a lot of very precise cutting in i decided it was to much for me and subbed the job out to a local flooring company im pleased with the result
if anyone is reading this prior to starting i would definatley do the flooring and build on it
main jobs that weve got to do now is a table top to allow us to eat at the front and some stainless steel splash backs for the cooker i also want to reline the two over bed lockers as i'mn not happy with them
ive also enlarged the opening to the gas locker its still a bit of a strugle to get the bottles in and out but definatley easier now
fitted two flouresent lights one in the cab and one above our bed despite their high wattage we have yet to find led's that are comfitable to read by

Friday, 8 October 2010

well its more of less done now only some tidying of wiring and a couple of small bits of wood work to hide some rough edges only big job left vis the seats but i still need to find an extra seat base. The documents have been with dvla for 3 weeks now so im waiting to get the body type changed to motorcaravan

Tuesday, 21 September 2010


managed to write this once and loose it befor sending DUH
Renee2 has been to her first festival and coped well as the festival was in lincs we popped to magnums for the last few bits of trim we needed to finish the wood work of some how is was persuaded into a new electric kettle and a step for outside the door to aleviate the train on or old knee joints
not much left to finish i thought but when i added all the little jobs up ill be lucky to finish before the clocks go back
paperwork has been sent to the dvla for change of body type which will give me another 10 mph legally

Thursday, 9 September 2010


sorry for anyone following the blog but a mixture of work weekends away and general laziness has delayed me posting for a good while .I seem to keep doing bits without much actually showing The wardrobe is now complete I managed to cut the first rail 10mm short but realised the round rail would be better than the oval one id started with as you dont need clearance to get it in the brackets so a bit of sucess out of a cock up realy. Made the first locker above the bed which also allowed me to get the rest of the wiring for that side completed
luckily when we visited magnun they had a van half built which alowed me to see how to make the lockers something i had been dreading once again turned out to be simple
I must say at this point the guys at magnums were right on my first vist they told be to board the whole van first which is what i should have done as fitting seperate backs in each cupboard is a nightmare
made the front of the second locker today so that should be complete tomorow also think ive got my head around the design of the lockers above the kitchen which has been puzzling me for a while
Ive fitted the fiamma dripstrip to try to stop the rain which floods in to the van when the side doors open ive also moved the awning forwards for the same reason word of warning the glue on the dripstrip is instant ive got a slightly wavy white gutter with a definate kink at the end doing it again i wod clamp a straight edge on first
fitted a led awning light due to the shape of the ducato the leds wind up facing straight out rather than down will see how it looks when were away next week it may have to be changed

Sunday, 15 August 2010

still no camera so no pics yet lots done and weve had our second excursion in her
decided to go with out the shower as we mostly stay on sites with facilities and we never used the one in our old talbot going without means we have room to put a wardrobe in what was oridinally going to be a wardrobe wound up to short for hanging anything due to lifting the fridge to clear side mouldings
Another trip to magnums to pick up some more ply and other bits was stretched to three days had a wander along that bit of coast that runs from the wash to the humber weather was dire and skeggy on a wet wednesday is so depresing
like so much of our coast line it all looks rundown and shabby with miles of static caravans beaches are fabulous and mostly empty
magnums were virtually out of the door ive used but have managed to find enough to finish it all but im going to have to cut some about a bit and nothing suitable for the toilet so ill have to make one which is a duanting prospect
spent all weekend getting the wardrobe shell fitted scribing in to the door way was a night mare and the first attempt finished up being a very exspensive template for the final piece trouble was it curved in every direstion and its so hard to work out where the panel was going to touch or pass the door rubber still its done now will try and get some pics tommorow
while i was at magnums they had a conversion they were doing in the shop so was good to see how theyve done stuff and im more confident about the top boxes now ive seen the way to do it

Monday, 5 July 2010

lots done in the last couple of weeks unfortunatley my sister has stolen my camera so no pics for a while
got the upholstry back from the trimmers and it looks fabulous blue and cream zebra stripes
water and waste tanks fitted and fiamma filler fitted in the side so we filled the water one and wired pump up to test the system now when i was doing it i bought some grey 12mm fittings from a plumbers merchant and every one of these leaked so now im getting some black ones to replace them still cant see the difference in the fittings 12mm is 12mm will see what happens with new fittings
ive fitted the tanks by screwing brackets to cross members and sika flexing them on if this is strong enough i dont know but if they come loose i can add some long bolts through later my theory is we shouldnt realy be driving with any fluids in them so next to no wieght just have to remember to empty them all the time
all the gas is now connected apart from the barbeque point which needs a bracket making so hope to do that today and test the gas just nope its more succesfull than the water. Ive fitted two small bottles and a changeover valve
doors are on the completed lockers just cant decide which handles and locks to fit magnets would be easiest but not sure if they will hold a wayward tin of beans on a fast corner same goes for the drawer which slides out easily i realy dont want to go down the push button catch route as you see so many with these
bought a table leg set and now its in its to high so im hopping to return for a shorter one
will add pics as soon as i can get a camera

Wednesday, 16 June 2010

spent nearly a week ,on and of ,making the top for the kitchen and finally got it fitted today sink is in cooker is in drawer is fitted waste connected and im realy pleased with it think, ive mastered the router at last ,
what caused me all he problems realy was i didnt want the cupboards to be as deep as the fridge /wardbobe unit as i felt it would look a bit box like if it was all level .When i planned it i didnt allow for the big vertical rib in the side of the van whic throws the cooker forwards 4 inches so ive made a deep work top to oversail the front of the units with the cooker within the depth
SPINFLOW
The screws that clamp the appliances down in the work top go through a plastic cup that realy isnt man enough, on one the stainless steel has chopped the rim of and now i need to get a replacement and the screws/bolts have such a fine thread they are a nightmare to use both sink and cooker are siliconed in so not going to move but need the cup as it holds the stop for the glass lid.
as the photo shows this has allowed me to get imagenative with the curves and some fancy router work on the edges since its my first attempt at laminate im dead chuffed
in between routing and glueing ive cut the tops for the bed boxes complete with lift up lids well actually lids as ive buggered one up and cant redo it till ive cut my last sheet of 12mm faced plyfor the batroom wall when if ive measuered right ill have an ofcut large enough to recut the lid

dont know how this picture got here but i cant seem to delete it still it shows how for its come

Thursday, 10 June 2010

work top

have just spent most of two days making the work top and fitting the sink and cooker in ,We had decided we wanted a worktop that was curved to allow a bit more floor space so this ruled out normal kitchen tops i decided to make it from birch faced ply original plan was two thicknesses but his didnt hide the bottom or the sink and cooker which oversail the units below so three it had to be ,on the up side i now know a bit more about using a router . Ive always liked the vanished edge on ply so now i have it in abundance
Getting the curves right was very tricky we tried marking round various tins plate etc but wound up doing them with a drawing compass I had to dredge up a lot of schoolboy geometry which was lurking in the old grey matter bisecting angles is obviously something like riding a bike
When i got the sink in place I found it was slightly damaged you couldnt see it immediately but it was half inch high one corner rather than send it back i manged the pin it in place with a board screwed down on top happy to report its now reasonably straight
Had a bit of a panic over the battery when we were playing with the seats a few weeks ago something got left switched on the next day i had no central locking and reverted back to using the key old skool style.decided to charge the battery this week as realey ill need to move it soon ,left it charging all night and next day still flat so back on for another night .When i got in this morning the smart charger was showing defective or deeply discharged battery thought some thing had gone most probably the battery but after connecting the earth back up it started first time .

Sunday, 6 June 2010

well ive decided work is the curse of the motorhome builder but ive had to do some this week but light nights and warm weather have allowed us to get a fair bit done mostly finishing things that were already half done.the thing with this building lark is you often need stuff in place to build around it so it gets left halfway.this week weve fitted the oven and the fridge all piped up and wired the battery now resides in a nice plastic box the pump is finally screwed down the wires from the tank gauge is neatly tied up underneath the van ready to connect as is the water pipe from pump to tank
at the moment im trying to get the bare essentials finished so i can get the gas tested as my insurers want a gas certificate whats realy annoying is im a registered gas fitter by trade and cant certify my own van still its only money and if we were worried about money we wouldnt have started this would we ?
also fitted some of the cbe electricals so far so good but some little problems the fused spur for the water heater has no continuity terminals for the earth wires and is so small its difficult to get the wires in one terminal is to small to use a insulated crimp on so had to trim the plasric back
why do the insist on fitting large multiway plugs on both ends of the tank probe leads to get the wires through a small hole i had to chop the ends of to be rejoined later ive done the same with the wire from the ultrastore as it wasnt long enogh i now need to find some five core alarm wire to extend it
still undecided on how to make the worktops as i realy want to curve the edges which rules out post formed chipboard domestic worktops not sure if my carpentry skils are up to routing timber edges onto a formica coated ply sheet for now im going to fit the ply and appliances in then decide if i need the curves as much as it seems now

Wednesday, 2 June 2010

just spent a cold damp weekend in norfolk why are bankhols always wet?have been picking away at bits that dont realy show on the new build some more wiring is in battery terminals fitted battery charger is fitted,put the two earth tags in water heater is now fitted and plumbed up down side of using 12mm is the lack of fittings available locally i would like to capp all the ends and test but dont have loads of 12mm caps to do this with
ive also glued the sheet of 3mm on the front of the kitchen units just need to cut out the holes with a stanly knife and add the edging
one thing i cant decide on is what to use for the work top it may just be fitted in ply for now till i can find a suitable finish for it realy need this done so i can fit all the gas appliances and get a gas cert to keep the insurance company happy pics will follow soon

Wednesday, 12 May 2010

ive been realy busy the last few days as everything has been going well no doubt now ive put it i writting that will change cut the vents in for the fridge after jiggling the hieght around to get fridge as low as lossible without having to cut in to the plastic mouldings on the van sides .While I was at it i cut in the mains hook up box which ive put at high level on the rambler its low and can be a bugger to line up especially in the dark so hopefully thats not going to be the case with renee2.ive now sealed the fridge vents so that theres no cold air getting in to the voids between insulation and lining boards
Once the hookup was in ive fitted the fuse board and put some more wiring inanything passing through the struts is in conduit or grommets
Decided i had a void behind the kitchen splash back so rather than run in the fridge void ive come out and back under it was just a case of im not sure if the heat from fridge would effect the cables but better safe than sorry
all the cables are p clipped as i dont want them moving around and possibly fraying or making a noise
last picture shows the fridge/ wardrobe unit with holes cut for the controlls between the two all the electrics are going under a false floor in the wardrobe above the fridge which will make them easily accesible if the wife doesnt fill it with shoes like the one indoors, only joking hun i agree a girl can never have enough shoes

Thursday, 6 May 2010

furniture

template made from old floor
right hand box devided to take gas bottles

got to the stage where i need to cut my first sheet of faced lightwieght ply i need to get a wall up to see where everything goes decided to cut a template first as it quite a complext mix of curves and straight bit and its all got to be a tight fit so using a section of the old ply floor i made it in two pieces first piece up to the start of the roof and then a piece for the top then i joined them with some 2x1 i then transfered this onto the first sheet , scribed round it and cut it with a jig saw after a bit of trimming and sanding it was in place
the template wasnt quite right to fit the opposite side but it was close enough so i repeated for the other side getting these two in place realy lets us see whats going where
seems like ive been measuring and measuring time and time again all weekbut the end result is both bed boxes are now made i cant final fit them till i position everything thats going in them gas bottles in the back of one and a small cupboard for the hook up lead and small bits and bobs battery is going next to the gas locker and possibly the water pump

Sunday, 2 May 2010

Bit of a milestone this week weve actually finished something .the ceiling one of thse jobs thats actually easier than you first think, was dreading the thought of all that overhead work .Used 3mm faced ply from magnums and the plastic jointing strips and edges i had already fitted batten between the ribs of the van and simply glued it up with fc40 I started with one sheet straight down the middlewith cut out for the roof lights glued only the center batten wedged it up and left it over night this way i could easily join to the edges
realised it was just as easy to panel over the second rooflight and stanly knife it out after it was alll stuck
if i was doing it again id put the batten on the ribs to get flat run down the length of the van i didnt as i was worried about hieght but 10 mm wouldnt make much difference

above picture is of the side door panel covered in carpet weve used the original 6 mm ply lining as the panels will have to be removeable im just going to screw the panels on with plastic covers on screws with hind sight we should have used the plastic push in 's which could have been glued to the board prior to covering then there wouldnt be anything showing , still next time

had lots of problems with the side door window frame as i spaced the frame out to match the lining opened the door only to find the frame collided with the side of the van stopping the door from opening so weve had to drop the inner part back into the lining unfortunatly after id thinned the frame down i forgot to change the fixing screws for some thing shorter and pushed one right through the side of the van the air was very blue for five minutes then i realised its not the end of the world, just close
all the time im doing a task in the van i find im also thinking about the next thing i really neeed to focus on one job at a time to make progress
weve also carpeted several bits that will show after the wall boards are up and also the panels for one back door and the side slider great stuff can be moulded around even the most akward corners with a bit of stretching or a few nips and tucks all stuck on with 120 degree spray adhesive we found its best to cut each piece over sized spray the adehisive on to the panel and the work from center sticking it down as you move outwards then trim of excess you do need lots of stanly blades as they soon lose the edge

Monday, 26 April 2010

Saturday, 24 April 2010


eventfull week,spent a day up ,north collecting stuff for the build cant recommend Magnums enough so helpfull and an amazing wharhouse full of every thing you need even had time for fish chips n mushy peas on the front at Cleethorpes
Got the tanks made to measure by a company called GFG plastics in Hull ordered monday and collected on Wednesday got them made blank with hatches so i can fit tails where i want them
Van went well but does seem a bit juicey so will have to give it a service
.
Fitted the last rooflight for the toilet/shower today and got some batten stuck up on the roof to take the ceiling boards also stuck a lot of the insulation on one side

Saturday, 17 April 2010


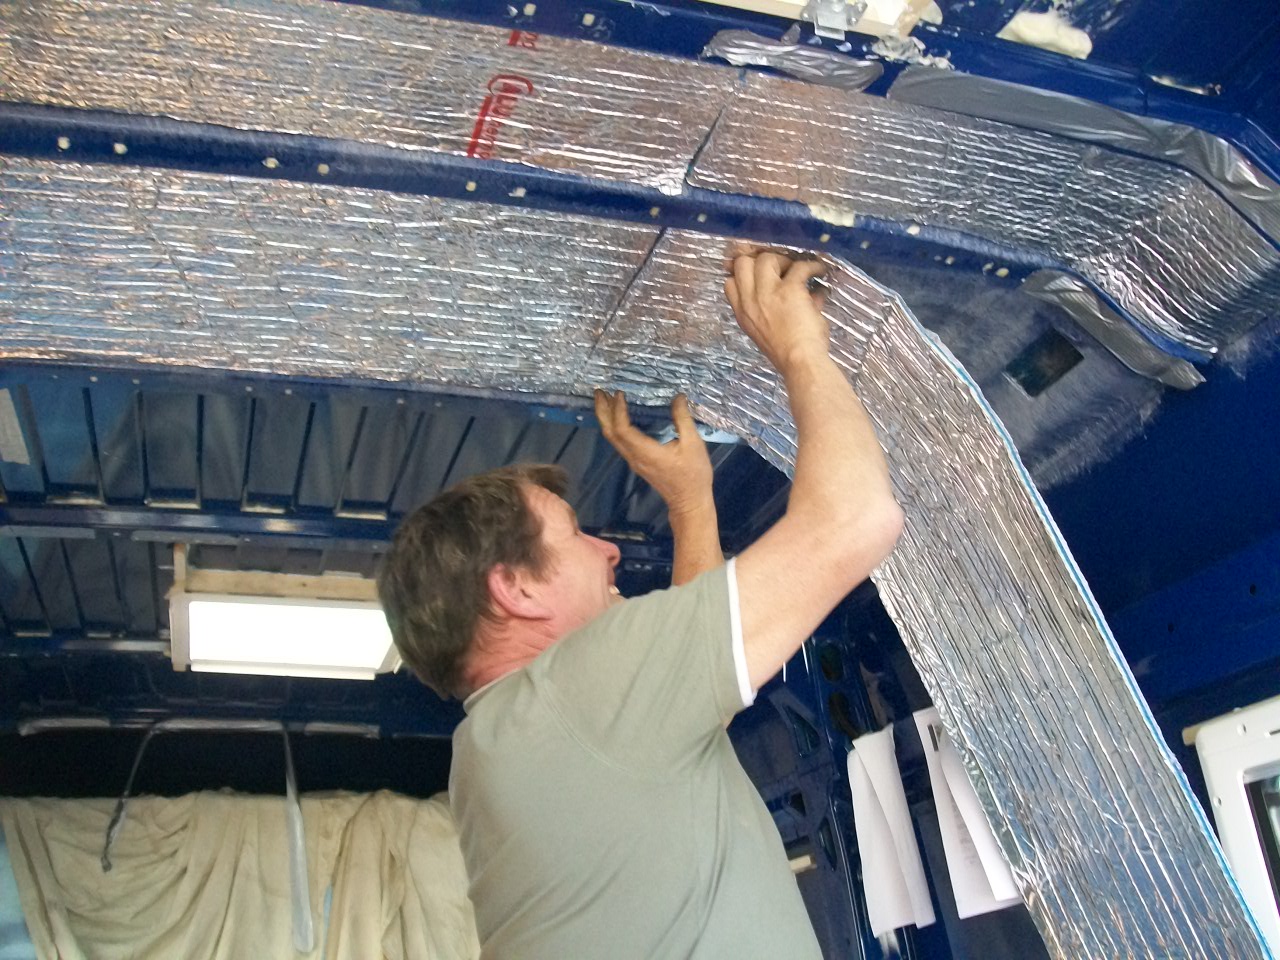
busy day today have insulated the roof using quatroturdo its a mix of air bubbles and foam with foil on both faces probably nowhere as good as kingspan but i didnt want to lose any more head room my rambler cant have much in the way of insulation in the hightop just glass fibre and carpet and weve always been warm enough in that once i get some battens up for the roof lining if theres any room i might add some thing else even if its only another layer of foiled bubble stuff every little most help.The ribs across the van ive foam filled with expanding foam theres only a few wires to go across the roof so i figure i can get them traped in the lagging in split conduit

Took the top of the battery box which is under the cab floor on a ducato sods law all the existing cable go out the opposite side to where i want to run mine
Looked at removing the plastic tray from above the cab only to find there not much under it just a couple of bars and the headlining so thats going to stay as i wont gain much space by removing it and it'll give me a big job to rebuild it
been watching a single passengers seat for the ducatto on ebay all week as usual i was all poised to bid for it in the last few minutes only to see the price rocket up to nearly £350 think my first idea of a day trip to france to see if i can find a second hand lhd drivers seat

Thursday, 15 April 2010

Just bought an under slung gas tank from ebay so dont need a gas locker now so Decided to alter the bed so we can get an upright at the end both to stop peole falling out the back of the van when it used as seats and to give support to the lockers and were going to have the more traditional drop down table rather than a pull out i think this could change again so watch this space
first pic shows the entire fleet of vehicles the white through the door is my work van ,renee 1 old faithfull (saab) and my daughters multi colored (mostly black repair panels )car
spent most of today fitting the heki midi bit of a nightmare with the corugated roof had to make small spacer from a strip of hardwood for each corugation both under and under the steel fc 40 everywhere i used sticky sealing strips and black carbond to seal it all down the screws that came with the heki are next to useless had it all in place and realised that they need a small screew driver bit which i couldnt find so replace them with some i had that i could get a turn on
i used black seal as the van is navy but would use white next time as it doesnt realy show and less obvious when you transfer it to the white plastic on your fingers

Tuesday, 13 April 2010


well its done now both windows on the off side are in and glued had more trouble with the second one than the first bit of over confidence probably.
Made frame for the door window popped the center hole through and marked the line to cut but as the sun was disappearing Ive left cutting and gluing till morning
found this is the best way to mark out the windows mark inside find the center and drill a small hole then transfer measurement to masking tape on the outside this way if it clashes with anything or you want to move up or down /left or right the hole is in the bit that coming out