Wednesday, 12 May 2010

ive been realy busy the last few days as everything has been going well no doubt now ive put it i writting that will change cut the vents in for the fridge after jiggling the hieght around to get fridge as low as lossible without having to cut in to the plastic mouldings on the van sides .While I was at it i cut in the mains hook up box which ive put at high level on the rambler its low and can be a bugger to line up especially in the dark so hopefully thats not going to be the case with renee2.ive now sealed the fridge vents so that theres no cold air getting in to the voids between insulation and lining boards
Once the hookup was in ive fitted the fuse board and put some more wiring inanything passing through the struts is in conduit or grommets
Decided i had a void behind the kitchen splash back so rather than run in the fridge void ive come out and back under it was just a case of im not sure if the heat from fridge would effect the cables but better safe than sorry
all the cables are p clipped as i dont want them moving around and possibly fraying or making a noise
last picture shows the fridge/ wardrobe unit with holes cut for the controlls between the two all the electrics are going under a false floor in the wardrobe above the fridge which will make them easily accesible if the wife doesnt fill it with shoes like the one indoors, only joking hun i agree a girl can never have enough shoes

Thursday, 6 May 2010

furniture

template made from old floor
right hand box devided to take gas bottles

got to the stage where i need to cut my first sheet of faced lightwieght ply i need to get a wall up to see where everything goes decided to cut a template first as it quite a complext mix of curves and straight bit and its all got to be a tight fit so using a section of the old ply floor i made it in two pieces first piece up to the start of the roof and then a piece for the top then i joined them with some 2x1 i then transfered this onto the first sheet , scribed round it and cut it with a jig saw after a bit of trimming and sanding it was in place
the template wasnt quite right to fit the opposite side but it was close enough so i repeated for the other side getting these two in place realy lets us see whats going where
seems like ive been measuring and measuring time and time again all weekbut the end result is both bed boxes are now made i cant final fit them till i position everything thats going in them gas bottles in the back of one and a small cupboard for the hook up lead and small bits and bobs battery is going next to the gas locker and possibly the water pump

Sunday, 2 May 2010

Bit of a milestone this week weve actually finished something .the ceiling one of thse jobs thats actually easier than you first think, was dreading the thought of all that overhead work .Used 3mm faced ply from magnums and the plastic jointing strips and edges i had already fitted batten between the ribs of the van and simply glued it up with fc40 I started with one sheet straight down the middlewith cut out for the roof lights glued only the center batten wedged it up and left it over night this way i could easily join to the edges
realised it was just as easy to panel over the second rooflight and stanly knife it out after it was alll stuck
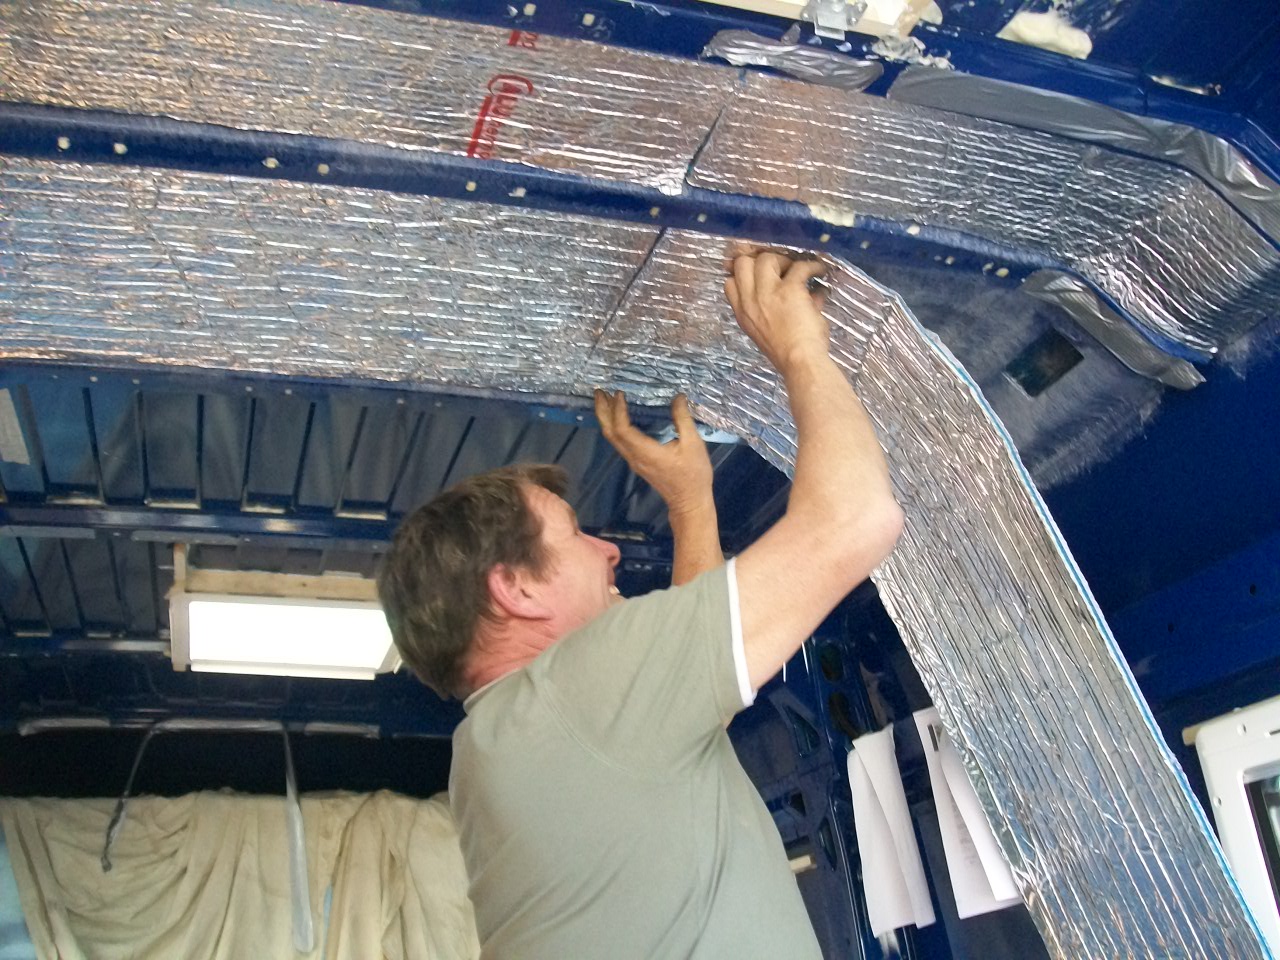
if i was doing it again id put the batten on the ribs to get flat run down the length of the van i didnt as i was worried about hieght but 10 mm wouldnt make much difference

above picture is of the side door panel covered in carpet weve used the original 6 mm ply lining as the panels will have to be removeable im just going to screw the panels on with plastic covers on screws with hind sight we should have used the plastic push in 's which could have been glued to the board prior to covering then there wouldnt be anything showing , still next time

had lots of problems with the side door window frame as i spaced the frame out to match the lining opened the door only to find the frame collided with the side of the van stopping the door from opening so weve had to drop the inner part back into the lining unfortunatly after id thinned the frame down i forgot to change the fixing screws for some thing shorter and pushed one right through the side of the van the air was very blue for five minutes then i realised its not the end of the world, just close
all the time im doing a task in the van i find im also thinking about the next thing i really neeed to focus on one job at a time to make progress
weve also carpeted several bits that will show after the wall boards are up and also the panels for one back door and the side slider great stuff can be moulded around even the most akward corners with a bit of stretching or a few nips and tucks all stuck on with 120 degree spray adhesive we found its best to cut each piece over sized spray the adehisive on to the panel and the work from center sticking it down as you move outwards then trim of excess you do need lots of stanly blades as they soon lose the edge

Monday, 26 April 2010

Saturday, 24 April 2010


eventfull week,spent a day up ,north collecting stuff for the build cant recommend Magnums enough so helpfull and an amazing wharhouse full of every thing you need even had time for fish chips n mushy peas on the front at Cleethorpes
Got the tanks made to measure by a company called GFG plastics in Hull ordered monday and collected on Wednesday got them made blank with hatches so i can fit tails where i want them
Van went well but does seem a bit juicey so will have to give it a service
.
Fitted the last rooflight for the toilet/shower today and got some batten stuck up on the roof to take the ceiling boards also stuck a lot of the insulation on one side

Saturday, 17 April 2010


busy day today have insulated the roof using quatroturdo its a mix of air bubbles and foam with foil on both faces probably nowhere as good as kingspan but i didnt want to lose any more head room my rambler cant have much in the way of insulation in the hightop just glass fibre and carpet and weve always been warm enough in that once i get some battens up for the roof lining if theres any room i might add some thing else even if its only another layer of foiled bubble stuff every little most help.The ribs across the van ive foam filled with expanding foam theres only a few wires to go across the roof so i figure i can get them traped in the lagging in split conduit

Took the top of the battery box which is under the cab floor on a ducato sods law all the existing cable go out the opposite side to where i want to run mine
Looked at removing the plastic tray from above the cab only to find there not much under it just a couple of bars and the headlining so thats going to stay as i wont gain much space by removing it and it'll give me a big job to rebuild it
been watching a single passengers seat for the ducatto on ebay all week as usual i was all poised to bid for it in the last few minutes only to see the price rocket up to nearly £350 think my first idea of a day trip to france to see if i can find a second hand lhd drivers seat

Thursday, 15 April 2010

Just bought an under slung gas tank from ebay so dont need a gas locker now so Decided to alter the bed so we can get an upright at the end both to stop peole falling out the back of the van when it used as seats and to give support to the lockers and were going to have the more traditional drop down table rather than a pull out i think this could change again so watch this space
first pic shows the entire fleet of vehicles the white through the door is my work van ,renee 1 old faithfull (saab) and my daughters multi colored (mostly black repair panels )car
spent most of today fitting the heki midi bit of a nightmare with the corugated roof had to make small spacer from a strip of hardwood for each corugation both under and under the steel fc 40 everywhere i used sticky sealing strips and black carbond to seal it all down the screws that came with the heki are next to useless had it all in place and realised that they need a small screew driver bit which i couldnt find so replace them with some i had that i could get a turn on
i used black seal as the van is navy but would use white next time as it doesnt realy show and less obvious when you transfer it to the white plastic on your fingers